
How to Make Coconut Milk: Easy Guide
Table of Contents
Learn how to make coconut milk easily. This ingredient is key in many cuisines, mainly in tropical areas. Making your own lets you adjust the texture and taste to your liking.
Fresh coconuts allow you to make a rich and creamy coconut milk right at home. It’s better than store-bought because it’s free from additives. This guide will show you how to make homemade coconut milk step by step.
Key Takeaways
- Discover the advantages of preparing homemade coconut milk.
- Understand the simple ingredients and equipment required.
- Follow a step-by-step guide to creating creamy coconut milk.
- Explore alternative methods for making coconut milk.
- Discover storage techniques for freshly made coconut milk.
- Find out the various culinary applications for homemade coconut milk.
The Benefits of Homemade Coconut Milk
Making your own coconut milk has many perks over buying it. You get to pick the ingredients, quality, and how it feels. This way, you can make sure it’s just right for you.
Nutritional Advantages
Homemade coconut milk keeps more nutrients because it’s not processed as much. It’s full of good fats, protein, and fiber. The medium-chain triglycerides (MCTs) in it help with energy and health.
Cost Effectiveness
Homemade coconut milk can save you money over time. Even though buying a coconut and tools costs a bit upfront, it’s worth it. You can make lots of batches from one coconut. Here’s a quick look at the costs:
| Product | Cost per Unit | Number of Servings | Cost per Serving |
|---|---|---|---|
| Store-bought Coconut Milk (14 oz can) | $2.50 | 4 | $0.625 |
| Homemade Coconut Milk (from a $1.50 coconut) | $1.50 | 6 | $0.25 |
Environmental Impact
By making coconut milk at home, you cut down on packaging waste. This green choice helps make your lifestyle more sustainable.
Avoiding Additives and Preservatives
Store-bought coconut milk often has extra stuff to last longer. But homemade coconut milk is free from these additives. This makes it a better choice for your health and your family’s.
In short, making coconut milk at home is great. It’s good for you, saves money, and is better for the planet. Plus, you avoid bad stuff found in commercial products.
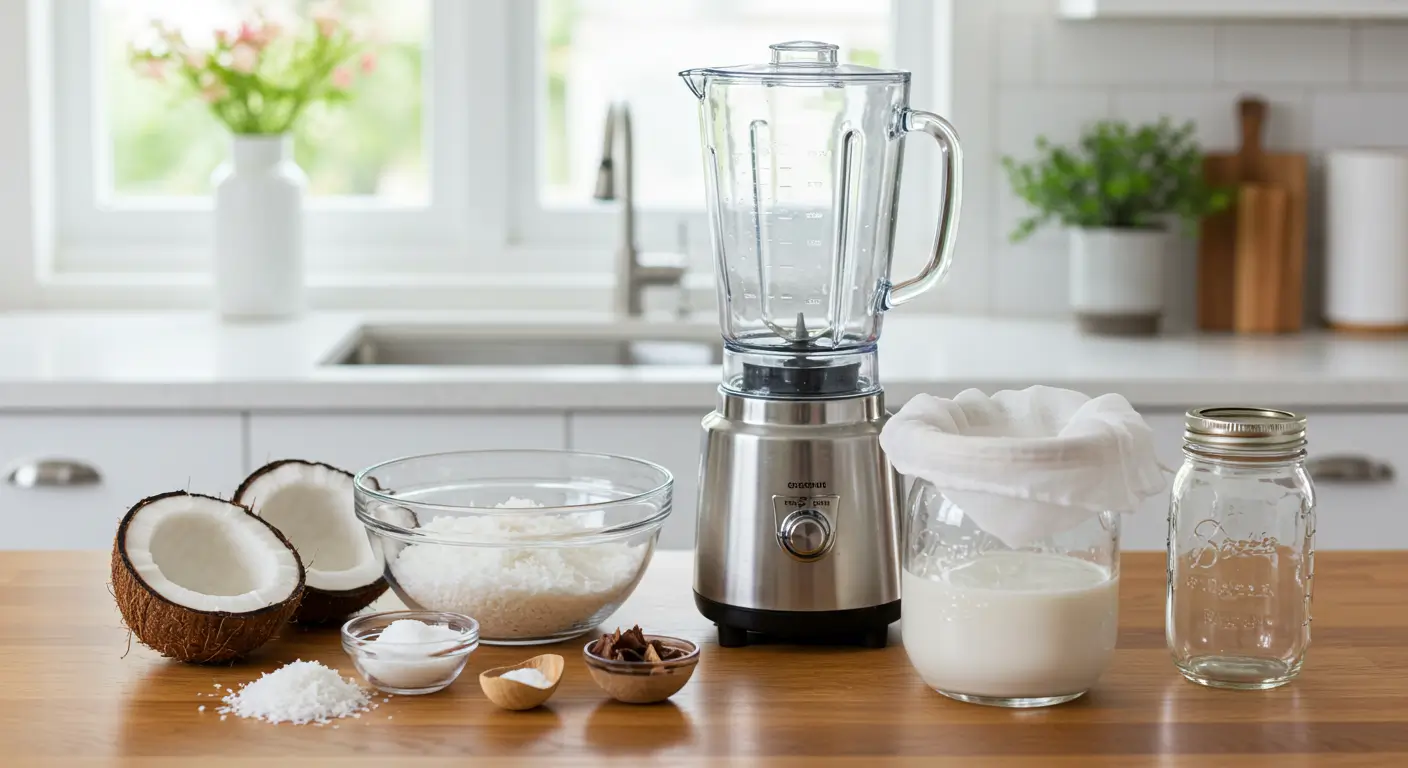
What You’ll Need: Ingredients and Equipment
To start making coconut milk, you need a few ingredients and basic tools. Making it at home is easy. The right tools and ingredients are key for the best results.
Essential Ingredients
The main ingredient is mature coconuts. You’ll also need water and a pinch of salt. Brown coconuts are best for richer, creamier milk.
- Mature coconuts: The main ingredient, providing the richness and creaminess.
- Water: Used to blend with the coconut flesh to create the milk.
- Salt: A pinch of salt can help bring out the flavor.
Kitchen Tools Required
You’ll need basic kitchen tools to process the coconuts. These include:
- Blender or Food Processor: To blend the coconut flesh with water.
- Cheesecloth or Nut Milk Bag: For straining the mixture to extract the coconut milk.
- Large Bowl: To hold the coconut milk after straining.
Optional Additions for Flavoring
For extra flavor, you can add vanilla, cinnamon, or other ingredients. These can make your coconut milk unique. It’s great for many recipes.
How to Make Coconut Milk: The Basic Method
Making your own coconut milk is simpler than you might think. It starts with a fresh, mature coconut. This way, you can control the consistency and flavor to your liking.
Selecting and Preparing the Coconut
The first step is picking the right coconut. You need a mature coconut for the best flavor and texture.
Choosing the Right Coconut
Look for a coconut that’s heavy for its size and has a hard, brown shell. Stay away from coconuts with cracks or soft spots. Shake it; if you hear water, it’s fresh.
Cracking and Extracting the Meat
To crack the coconut, heat it in a preheated oven at 350°F (175°C) for 10-15 minutes. Then, cool it a bit. Wrap it in a towel and hit it with a hammer to crack it open. Rinse the coconut meat under cold water to get rid of shell bits.
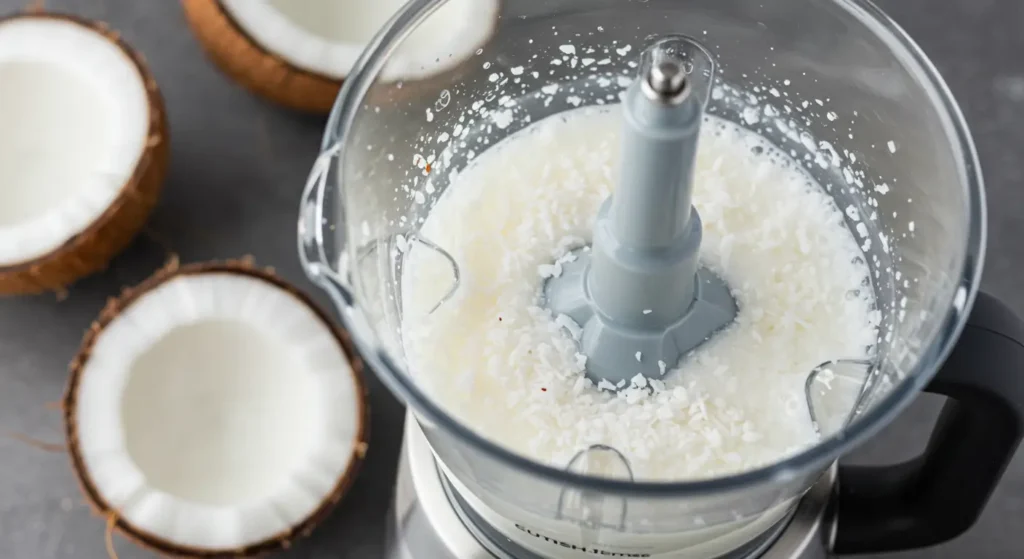
The Blending and Extraction Process
Place the coconut meat in a blender along with water. Adjust the amount of water based on your desired milk thickness. Blend until the mixture is smooth and the coconut is finely processed.
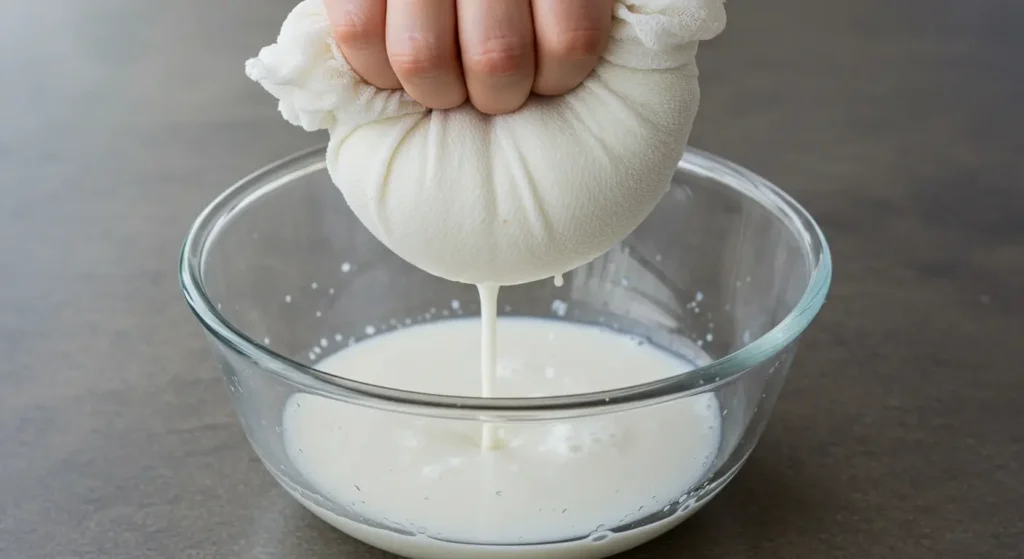
Strain the mixture through a cheesecloth or nut milk bag into a bowl. Squeeze to get as much milk as you can from the pulp. You might need to do this a few times to get the right consistency.
Straining and Finishing Touches
After extracting the milk, strain it again through a fine-mesh sieve or cheesecloth. This makes the milk smooth and creamy. You can keep it in the fridge for up to 3 days or freeze it for longer.
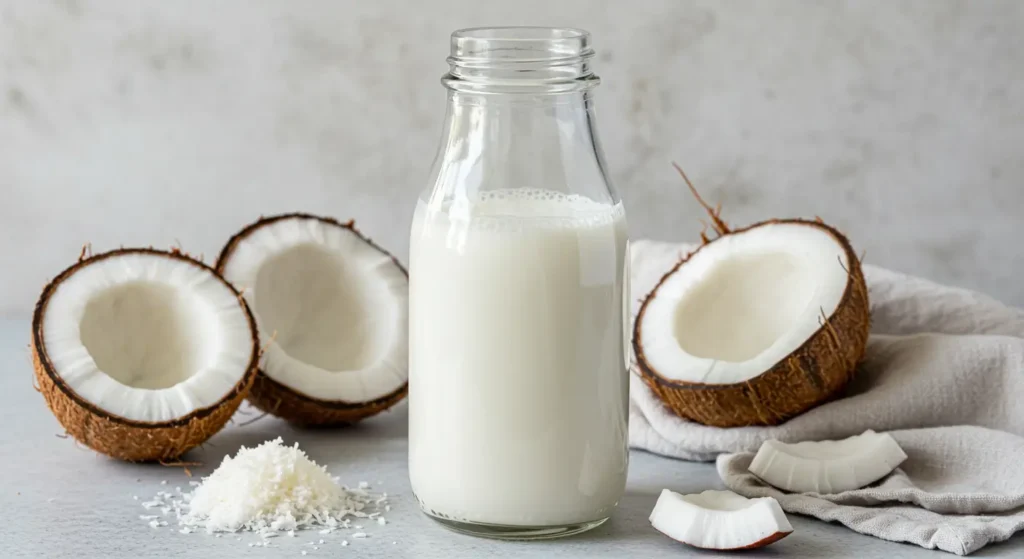
Now you know how to make coconut milk. You can use it in many dishes, like curries and smoothies. Making it at home saves money and lets you avoid additives and preservatives found in store-bought versions.
Alternative Methods for Making Coconut Milk
There are many ways to make coconut milk, not just one. Choose the method that best suits your equipment and preferences. You can choose based on the consistency you want.
Using Dried Coconut Flakes
Using dried coconut flakes is easy if you can’t find fresh coconuts. Just soak the flakes in water, blend, and strain. It’s a great option when fresh coconuts are hard to find.
Quick Blender Method
The quick blender method is fast. Blend shredded coconut with hot water, then strain it. It’s perfect for when you’re short on time or have simple kitchen tools.
Traditional Hand-Pressed Technique
The traditional way involves grating coconut and squeezing it through a cheesecloth. It takes more work but lets you control the milk’s texture. It’s good for those without special tools.
Using a Coconut Milk Press
A coconut milk press makes making milk easy. It’s a good buy if you make coconut milk often. It makes high-quality milk quickly.
| Method | Equipment Needed | Time Required | Resulting Consistency |
|---|---|---|---|
| Dried Coconut Flakes | Blender, strainer | 15-20 minutes | Variable, depending on rehydration ratio |
| Quick Blender Method | Blender, strainer | 10-15 minutes | Rich and creamy |
| Traditional Hand-Pressed Technique | Grate, cheesecloth or fine-mesh sieve | 30-40 minutes | Highly customizable |
| Coconut Milk Press | Coconut milk press | 5-10 minutes | Consistently high quality |
Each method has its own benefits. Choose based on what you need and like. Experimenting with various methods can help you discover the one you like best.
Storing and Using Your Homemade Coconut Milk
Keeping your homemade coconut milk fresh is crucial. Once prepared, transfer it to an airtight container and refrigerate. This keeps it fresh for longer and preserves its nutrients.
Proper Storage Techniques
For storing coconut milk, use an airtight container in the fridge. You can also freeze it for even longer. Freezing in ice cube trays is a good way to portion it for recipes.
Shelf Life Guidelines
Coconut milk stays good for 3 to 5 days in the fridge. Frozen, it lasts months. Always check for spoilage before using.
Culinary Applications
Coconut milk is great for many dishes, from sweet to savory.
Sweet Recipes
It’s perfect for smoothies, desserts, and puddings. It’s also great in vegan ice cream, adding creaminess.
Savory Dishes
In savory dishes, it’s a key ingredient. It makes curries, soups, and stews creamy and rich.
| Dish Type | Examples | Coconut Milk Usage |
|---|---|---|
| Sweet | Smoothies, Desserts, Puddings | Base or creamy addition |
| Savory | Curries, Soups, Stews | Main ingredient or thickening agent |
Using Coconut Milk Byproducts
Don’t throw away the coconut pulp. Dry it to make flour or use it in baking.
Conclusion
Now you know how to make coconut milk at home. You can enjoy its many benefits. These include its nutritional value, cost-effectiveness, and environmental benefits.
By making homemade coconut milk, you avoid additives and preservatives. This makes it a healthier and more sustainable choice for your kitchen.
Creating your own coconut milk is easy and rewarding. It’s great for many dishes. Whether you’re experienced or new to cooking, try making your own coconut milk.
By controlling what goes into your coconut milk, you get its rich flavor and nutrients. Plus, you help the environment. So, start making your own homemade coconut milk today. See how it changes your cooking and baking.
FAQ
What type of coconuts should I use to make coconut milk?
Use mature coconuts, also known as brown coconuts, for coconut milk. They have a harder shell and more meat than young coconuts. This makes them perfect for extracting coconut milk.
Can I use dried coconut flakes to make coconut milk?
Yes, dried coconut flakes can be used as a substitute for fresh coconuts. Just rehydrate the flakes with water and blend them to make the milk.
How long does homemade coconut milk last?
Homemade coconut milk lasts 3 to 5 days in the fridge. You can also freeze it for up to 3 months. Always check for spoilage before using it.
Can I use coconut milk in savory dishes?
Yes, coconut milk is great in savory dishes like curries, soups, and stews. It adds a rich, creamy texture and a unique flavor.
How do I store coconut milk byproducts?
Store coconut pulp in the fridge for up to 3 days or freeze for up to 3 months. Use it in baked goods, smoothies, or as a topping for oatmeal or yogurt.
Can I make coconut milk without a blender or food processor?
Yes, you can make coconut milk without a blender or food processor. Use a traditional hand-pressed method or a coconut milk press to get the same result.
Is homemade coconut milk healthier than store-bought coconut milk?
Yes, homemade coconut milk is healthier than store-bought. It doesn’t have additives and preservatives. You can control the ingredients and ensure it’s fresh and of high quality.