
Easy Reka Bread Recipe
Table of Contents
Are you looking to bake delicious, soft, and fluffy homemade loaves? The reka bread recipe is a perfect choice for you. This traditional recipe yields a mouth-watering treat that’s sure to become a family favorite.
Baking your own homemade reka bread allows you to control the ingredients. This ensures a healthier and more flavorful product. With this simple recipe, you’ll be able to create loaves that are not only delicious but also visually appealing.
In this article, we’ll guide you through the process of making soft and fluffy reka bread at home. You’ll learn the essential steps and tips to achieve perfect loaves every time.
Key Takeaways
- Learn how to make soft and fluffy reka bread at home.
- Understand the benefits of baking homemade reka bread.
- Discover the essential ingredients and steps for the reka bread recipe.
- Get tips for achieving perfect loaves every time.
- Explore the advantages of controlling ingredients in your homemade bread.
What Is Reka Bread?
Exploring reka bread starts with its origins and cultural background. It’s a traditional bread that has been a key part of many cultures for centuries.
Origins and Cultural Significance
Reka bread originated in a specific cultural context. It was a big part of community gatherings and traditional ceremonies. Its cultural significance shows in how it’s made and eaten. The bread is baked for special events, showing unity and togetherness.
- Reka bread is a symbol of community.
- It is often served during traditional events.
- The bread’s preparation involves traditional techniques.
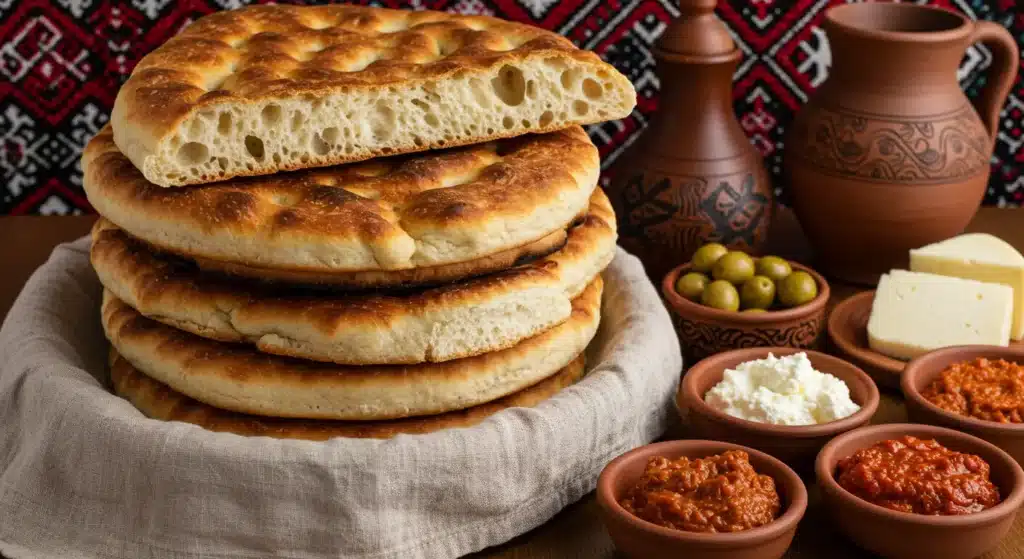
Characteristics of Traditional Reka Bread
Traditional reka bread is famous for its distinctive texture and flavor. It has a crusty exterior and a soft interior. These qualities come from a special baking method and top-notch ingredients.
- The crust is crunchy and golden.
- The interior is soft and airy.
- The flavor is rich and slightly tangy.
Essential Ingredients for Perfect Reka Bread
The secret to a perfect Reka bread is in the ingredients. You need to pick the right parts for your dough. This will give you that soft, fluffy texture.
Flour Selection and Alternatives
Choosing the right flour is key for Reka bread. The kind of flour you use has a major impact on the bread’s flavor and texture.
Best Types of Flour for Reka Bread
For traditional Reka bread, high-protein bread flour is best. It creates a strong gluten structure. This is vital for the bread’s texture.
Gluten-Free Options
To make it gluten-free, opt for a flour blend made for gluten-free baking—these often include rice flour, potato starch, and tapioca flour.
Leavening Agents
Reka bread primarily relies on active dry yeast to help it rise. It ferments the dough’s sugars, making it rise. Fresh yeast gives the best results.
Additional Ingredients for Flavor and Texture
Ingredients like salt, sugar, and sometimes butter or oil are added too. Salt controls yeast, and sugar feeds it. These add flavor and texture to the bread.
Equipment You’ll Need
To bake reka bread, you’ll need some basic kitchen tools and optional specialized equipment. The right tools can greatly improve your bread’s quality.
Basic Kitchen Tools
You’ll need a mixing bowl, measuring cups and spoons, a wooden spoon or dough whisk, and a baking sheet or bread stone. Also, a clean surface for kneading the dough. These tools are probably in your kitchen already, so you can start baking reka bread easily.
Essential tools:
- Mixing bowl
- Measuring cups and spoons
- Wooden spoon or dough whisk
- Baking sheet or bread stone
Optional Specialized Equipment
While not essential, some specialized equipment can make baking reka bread better. A stand mixer with a dough hook attachment can help with kneading. A bread peel makes transferring dough to the oven easier. A digital thermometer ensures your ingredients are at the right temperature.
Optional equipment:
- Stand mixer with dough hook attachment
- Bread peel
- Digital thermometer
Reka Bread Recipe
To make authentic Reka Bread, follow our step-by-step guide. This recipe will show you how to make delicious, homemade Reka Bread.
Ingredient Measurements and Preparation
Start by gathering your ingredients. For classic Reka Bread, use 2 cups of all-purpose flour, 1 teaspoon each of salt and sugar, and one packet of active dry yeast. Accurate measurements are key to achieving the best outcome.
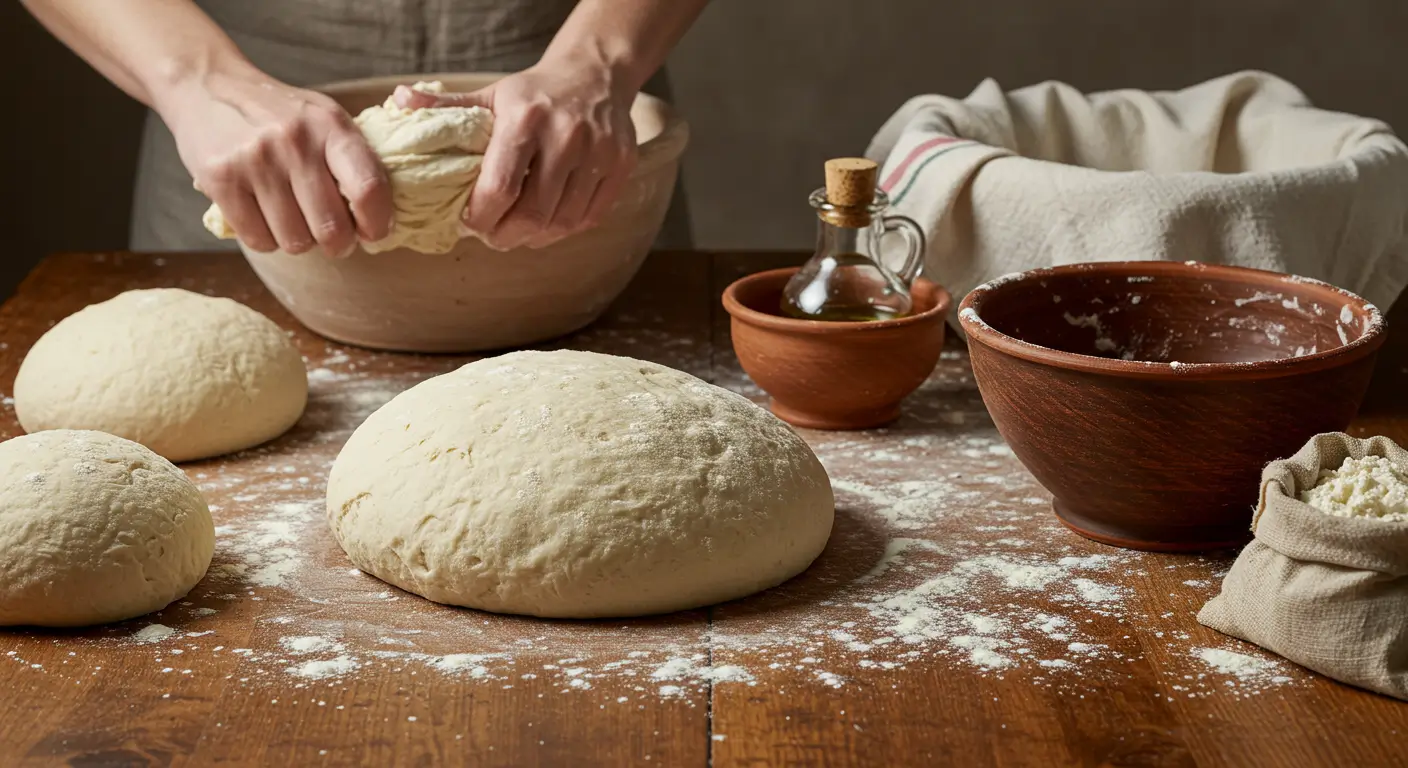
Mixing and Kneading Process
Combining and kneading the ingredients are essential parts of dough preparation. You can do this manually or with the help of a stand mixer.
Hand Kneading Technique
Kneading by hand lets you feel the dough’s texture. Knead for about 10 minutes until it’s smooth and elastic.
Using a Stand Mixer
If you prefer a stand mixer, use the dough hook attachment and mix for 5-7 minutes. This method is quicker and easier.
First and Second Rise
Let the dough rise in a warm, draft-free place. The first rise should take about 1 hour. After shaping, the second rise will take approximately 30-45 minutes.
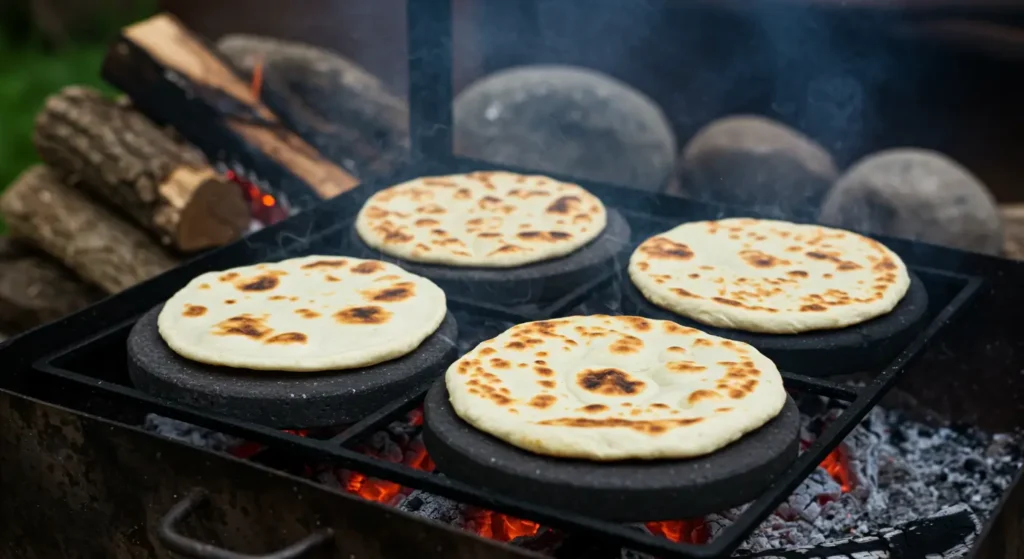
Baking Temperature and Time
Preheat your oven to 375°F (190°C). Bake the Reka Bread for 25–30 minutes until it turns golden brown.
Troubleshooting Common Reka Bread Problems
Reka bread lovers often face issues with texture, flavor, and quality. Knowing how to fix these problems is key to baking the perfect loaf.
Addressing Texture Issues
Texture problems are common in reka bread baking. Issues can include loaves that are too dense or too crumbly.
Too Dense or Heavy
A dense or heavy loaf can come from overmixing the dough or too much flour. To fix this, measure ingredients carefully and mix just until combined.
Too Crumbly
Crumbly bread might be from underproofing or not enough moisture. Adjust proofing time and dough hydration to solve this.
Fixing Flavor Problems
Flavor issues can ruin your reka bread experience. Problems like bland or sour tastes often stem from ingredients or fermentation.
- Check your ingredients for freshness and quality.
- Adjust your fermentation time for better flavor balance.
Solving Baking Challenges
Baking challenges, like uneven baking and crust problems, can also affect your bread’s quality.
Uneven Baking
Uneven baking might be due to an unheated oven or a cold baking stone. Make sure your oven and stone are at the right temperature for even baking.
Crust Issues
Crust problems, like it being too hard or soft, can be fixed by adjusting baking time and temperature. Try different steaming methods during baking to improve the crust.
Delicious Variations of Reka Bread
Trying out different reka bread recipes can make baking more fun. You can change the basic recipe to make it taste and feel different. This way, you can meet the needs of various tastes and diets.
Sweet Reka Bread Options
Make reka bread sweet by adding dried fruits, nuts, or chocolate chips. A little cinnamon or vanilla can also make it taste better. Here are some sweet reka bread ideas:
- Cinnamon bread ” raisin reka “
- Nutella-filled reka bread
- Fruit-infused reka bread
Savory Reka Bread Alternatives
For a savory twist, add herbs, cheese, or spices to the dough. This makes it great with soups or salads. Here are some savory options:
- Rosemary and olive reka bread
- Cheddar and chive reka bread
- Garlic and herb reka bread
Dietary-Specific Adaptations
Reka bread can be made to fit different diets. For example, you can: substitute regular flour with a gluten-free blend, use plant-based milk and butter for a dairy-free version, or replace eggs with flaxseed or applesauce to make it vegan.
Vegan Reka Bread
Make a vegan version by using plant-based milk and no eggs.
Low-Carb Versions
Use almond flour or coconut flour to make reka bread lower in carbs. This is good for low-carb diets.
Storing and Serving Your Homemade Reka Bread
To keep your Reka bread fresh and tasty, you need to know the best ways to store and serve it. Using the right methods will help keep its texture and taste just right.
Proper Storage Methods
For short-term storage, you can keep your Reka bread at room temperature or in the fridge. Short-term storage means:
Short-Term Storage
Store it in a paper bag or on a breadboard to keep the crust crisp. This lets air in to stop moisture from building up.
Freezing and Thawing
For longer storage, freeze your Reka bread. Just wrap it tightly in plastic wrap or foil and put it in the freezer. When you’re ready, thaw it at room temperature or reheat it in the oven.
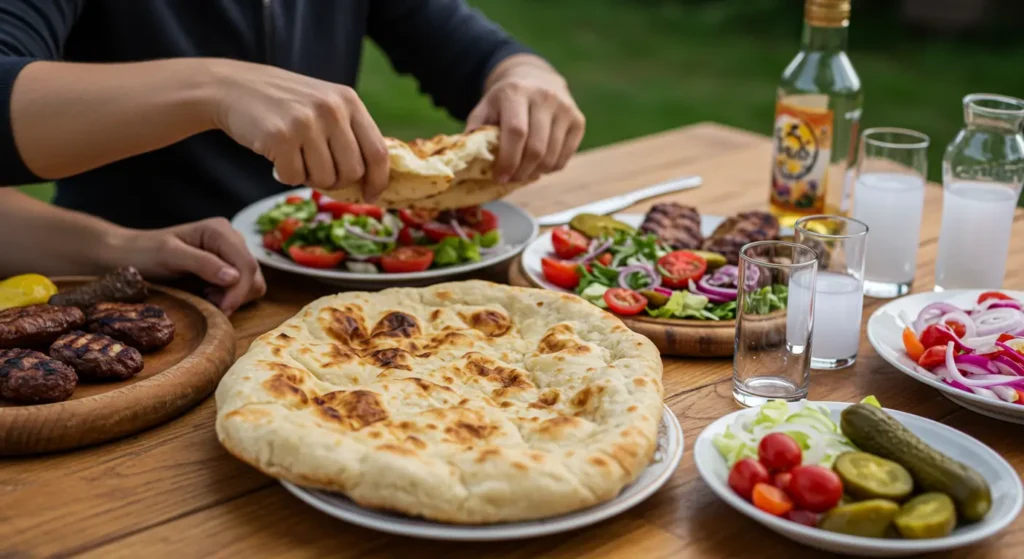
Serving Suggestions and Pairings
Reka bread is very versatile and can be served in many ways. Traditional accompaniments include:
Traditional Accompaniments
Serve it with butter, jam, or alongside soups and stews for a filling meal.
Modern Serving Ideas
Use Reka bread for sandwiches or toast with avocado, hummus, or other spreads for a fresh twist.
Conclusion
Follow the reka bread recipe in this article to create soft, fluffy loaves. It’s like getting bread from a traditional bakery. Mixing, kneading, proofing, and baking reka bread is rewarding. It lets you connect with a rich cultural heritage.
A reka bread recipe summary shows it’s simple and versatile. With basic ingredients and practice, you can become a pro at baking reka bread. Making homemade bread is fresh, customizable, and joyful.
Now, it’s time to start baking reka bread. Try different flavors, like sweet or savory, to find your favorite. With homemade reka bread, you can enjoy a fresh loaf anytime. You’ll also dive into the world of artisanal bread baking.
FAQ
What is reka bread?
Reka bread comes from Eastern Europe. It’s known for its soft, fluffy texture and rich taste.
Can I make reka bread gluten-free?
Yes, you can make reka bread gluten-free. Use gluten-free flours like almond or coconut flour. Just adjust the recipe a bit.
What type of flour is best for reka bread?
For reka bread, use a high-protein flour. This includes bread flour or all-purpose flour with high protein. It helps create a strong gluten structure.
How do I store homemade reka bread?
Store homemade reka bread at room temperature for up to 3 days. Or, freeze it for up to 3 months. Thaw it when you need it.
Can I make reka bread using a stand mixer?
Yes, a stand mixer with a dough hook attachment can help. It makes kneading easier.
What are some common issues with reka bread texture?
Issues like dense or heavy bread, or too crumbly bread can happen. They’re often due to wrong ingredient ratios, not enough kneading, or bad proofing.
How do I achieve a crispy crust on reka bread?
For a crispy crust, bake at a higher temperature. Use a baking stone. Or brush the crust with water or egg wash before baking.
Can I make sweet reka bread?
Yes, you can make sweet reka bread. Add sugar, honey, or dried fruits to the dough. Adjust the recipe as needed.
How do I know when reka bread is fully baked?
Check if reka bread is fully baked by looking for a golden-brown crust. The internal temperature should be around 200°F to 210°F.